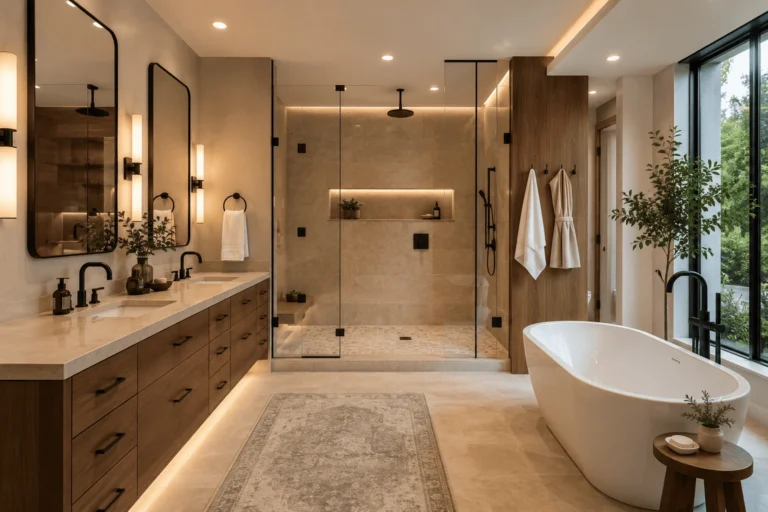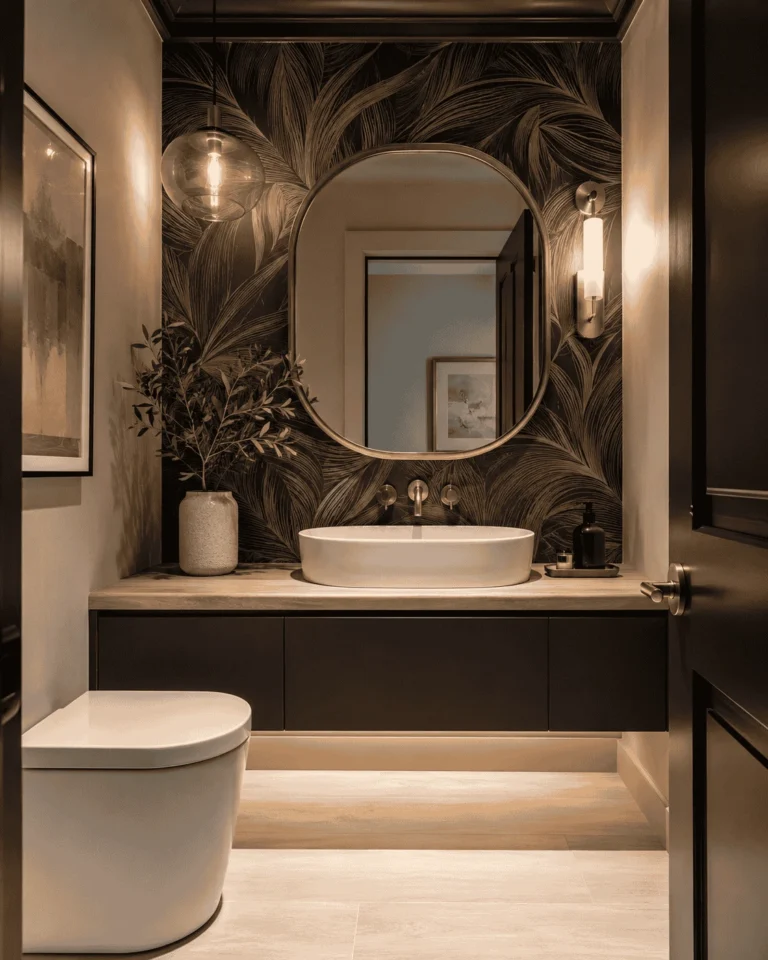
Remodeling a tiny bathroom is not simply a smaller version of remodeling a large one. Every door swing, plumbing connection, storage shelf and fixture dimension can affect how comfortably the room works. A vanity that is only four inches too deep may block movement. A poorly placed shower door can strike the toilet. Beautiful tile cannot compensate for inadequate ventilation or failed waterproofing.
Tiny Bathroom Remodel
Before and After: Transforming a cramped space with smart shower, vanity, and lighting upgrades.
- Cramped Shower/Tub Combo: Dark, enclosed fiberglass insert that made the room feel smaller.
- Bulky Floor Vanity: Took up valuable floor space and trapped dust underneath.
- Poor Lighting: A single harsh overhead fixture casting unflattering shadows near the mirror.
- Inefficient Layout: Swinging door collided with storage elements.
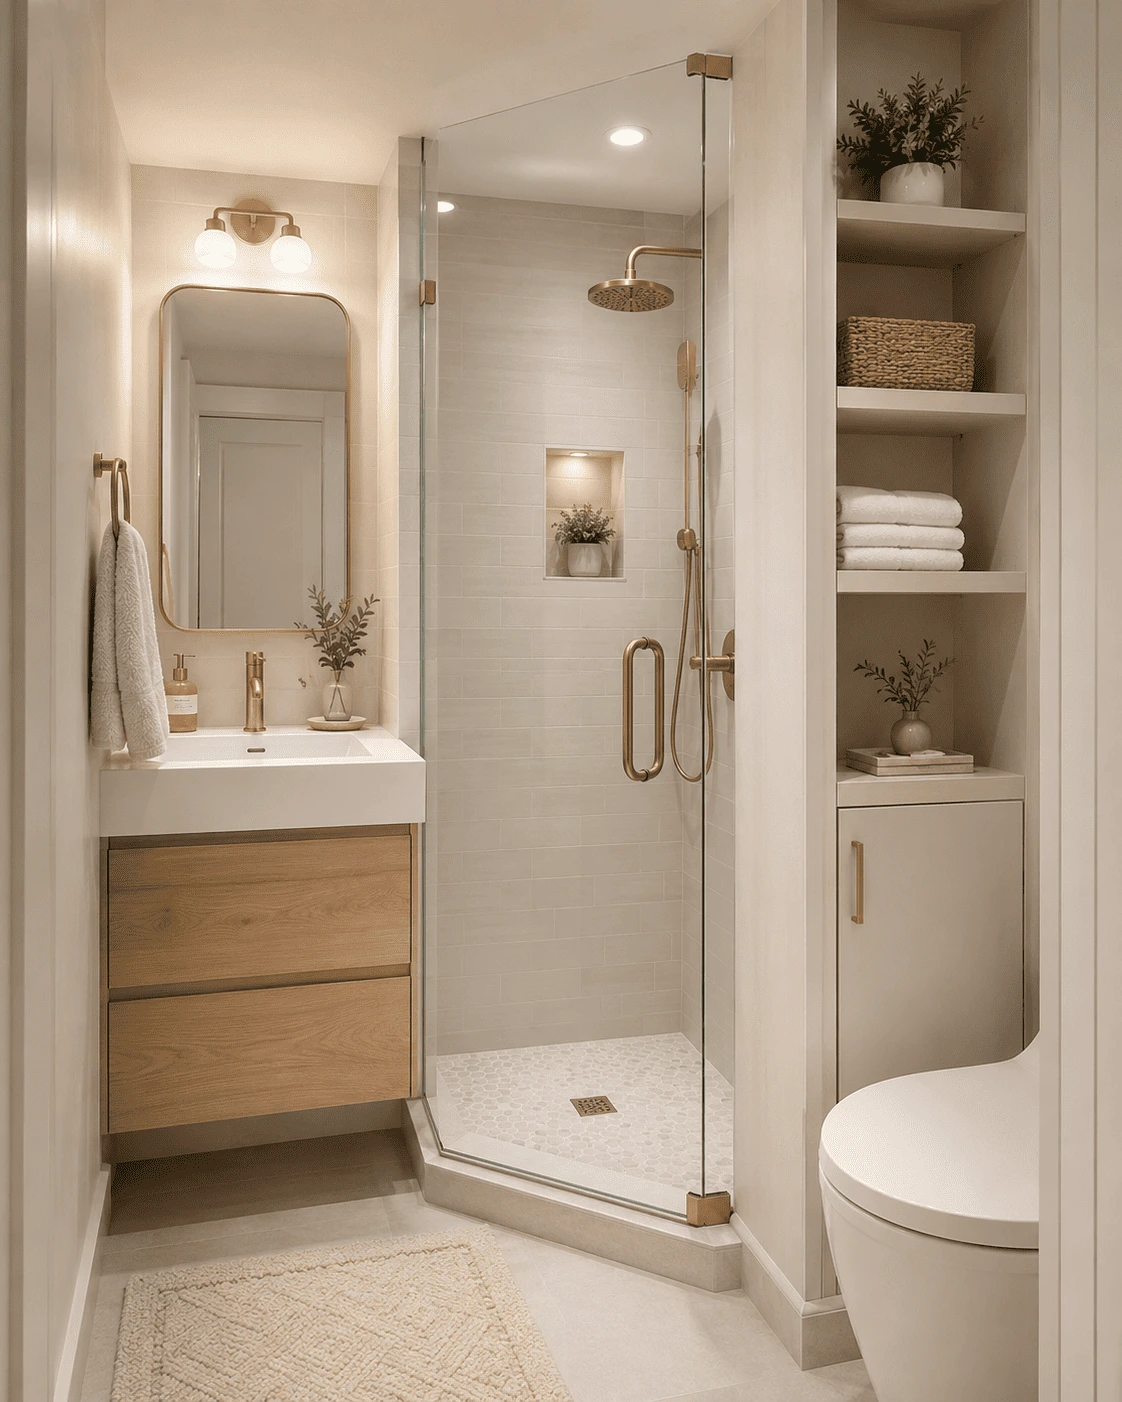
- Walk-In Glass Shower: Frameless glass panel and light-colored large-format tile opened up the room.
- Floating Vanity: Exposed floor area to create a spacious visual illusion and custom height.
- Layered LED Lighting: Sconces flanking the mirror combined with recessed ceiling lights.
- Optimized Storage: Recessed medicine cabinet built directly into the wall cavity.
Key Transformation Highlights
1. The Shower Upgrade
Swapped the dated acrylic tub for a walk-in enclosure featuring clear frameless glass. This removed visual barriers, allowing natural light to flow uninterrupted across the entire footprint.
2. The Vanity Solution
Replaced a heavy, space-hogging cabinet with a wall-mounted floating vanity. Paired with deep pull-out drawers instead of traditional doors, it maximizes utility without cluttering the floor plan.
3. The Lighting Overhaul
Transitioned from a single overhead bulb to a layered scheme. Vertical wall sconces placed at face-height eliminated harsh mirror shadows, perfectly complemented by warm task lighting.
The good news is that limited square footage can force better decisions. Keeping the plumbing in practical locations, selecting properly scaled fixtures and using walls for storage can make a compact bathroom feel calmer, brighter and easier to maintain.
This bathroom remodeling guide explains how to plan the layout, build a realistic budget, choose space-saving products and avoid expensive mistakes. It also covers the parts that are less visible in finished photographs—waterproofing, ventilation, permits, electrical work and construction sequencing.
Quick Answer:
What Is the Best Way to Remodel a Tiny Bathroom?
The best way to remodel a tiny bathroom is to improve circulation before choosing decorative finishes. Measure the room accurately, keep major plumbing in place when possible, choose compact fixtures, add recessed or vertical storage, improve ventilation and protect every wet area with a complete waterproofing system.
Use this priority order:
- Fix leaks, moisture damage and unsafe conditions.
- Confirm the layout and door clearance.
- Plan plumbing, electrical and ventilation.
- Select fixtures using actual dimensions.
- Complete waterproofing and substrate preparation.
- Install durable finishes.
- Add storage, mirrors, lighting and accessories.
What Counts as a Tiny Bathroom?
A tiny bathroom is generally a compact room in which the toilet, sink and shower or bathtub must share a limited footprint. There is no single national size that defines “tiny.” A powder room may contain only a toilet and sink, while a small full bathroom must also accommodate bathing.
Common compact configurations include:
- A narrow powder room
- A three-quarter bathroom with a shower
- A 5-by-8-foot full bathroom
- A condominium guest bathroom
- An under-stair bathroom
- An ensuite carved from an existing bedroom
- A small bathroom with an angled ceiling
- An older bathroom with fixtures placed along one wall
A room should not be judged by square footage alone. Door position, ceiling height, plumbing walls, windows and structural restrictions can make two bathrooms of equal size perform very differently.
Pocket Door vs. Barn Sliding Door
Choosing the right bathroom door can save valuable floor space. A pocket door disappears into the wall for a clean look, while a barn sliding door mounts on the outside of the wall and is easier to install in many remodels.
| Feature | Pocket Door | Barn Sliding Door |
|---|---|---|
| Appearance | Hidden inside the wall | Visible on the wall |
| Privacy | Better | Less |
| Wall Requirement | Requires a wall cavity | No wall cavity needed |
| Space Saving | Excellent | Very Good |
| Installation | More complex | Simpler retrofit |
| Best For | New construction or major remodels | Quick renovations and existing walls |
How Should You Plan a Tiny Bathroom Remodel?
Start by documenting how the existing bathroom works and where it fails. Do not begin by buying tile or saving random inspiration photographs. First identify the functional problems the remodel must solve.
Measure the Existing Room
Record the following measurements:
- Wall-to-wall dimensions
- Ceiling height
- Door width and swing
- Window dimensions and sill height
- Vanity depth and width
- Toilet centerline
- Distance between fixtures
- Shower or bathtub dimensions
- Plumbing supply and drain locations
- Exhaust fan and duct location
- Outlet and switch positions
- Floor height at the doorway
Measure at more than one point. Older walls may not be perfectly straight, square or level.
Create a simple scaled drawing. Mark the space needed to open drawers, cabinet doors, shower doors and the bathroom entrance. A fixture can technically fit while still making the room uncomfortable to use.
Define Must-Haves Before Nice-to-Haves
Divide your goals into three groups.
Must-haves may include fixing a leaking shower, improving ventilation, replacing unsafe flooring or adding usable storage.
Strong preferences might include a larger vanity, frameless glass, better lighting or a handheld showerhead.
Optional upgrades may include premium tile, heated flooring, decorative lighting or custom cabinetry.
This process protects the essential work when the budget changes.
Shower Types Comparison
| Shower Type | Best For |
|---|---|
| Walk-in Shower | Adults seeking an open, modern design with easy access. |
| Corner Shower | The smallest bathrooms where maximizing floor space is essential. |
| Tub/Shower Combination | Families who need both bathing and showering functionality. |
| Curbless Shower | Accessibility, aging in place, and barrier-free bathroom designs. |
What Is the Best Layout for a Tiny Bathroom?
The best tiny bathroom layout creates a clear path from the entrance while preventing doors, drawers and fixtures from competing for the same space. Keeping the toilet, sink and shower close to existing plumbing can also reduce construction complexity.
Common Tiny Bathroom Layouts
| Layout | Best For | Main Advantage | Possible Limitation |
| Fixtures along one wall | Narrow rectangular bathrooms | Simple plumbing and clear circulation | Limited vanity width |
| Shower at the far end | 5-by-8 or similar rooms | Creates a natural visual endpoint | Shower dimensions must be checked carefully |
| Corner shower | Square or awkward rooms | Frees central floor area | Smaller enclosure may feel tight |
| Tub-shower combination | Family bathrooms | Preserves bathing and showering | Tub apron occupies visual and physical space |
| Doorless or fixed-panel shower | Adult or guest bathrooms | Reduces door conflicts | Splash control and drainage require careful planning |
| Wall-mounted sink and toilet | Very compact rooms | Exposes more floor area | Installation and in-wall service access can cost more |
| Powder room layout | Toilet and sink only | Simple, efficient footprint | No bathing function |
The familiar 5-by-8 layout often places the vanity, toilet and tub or shower in sequence. Keeping plumbing on one wall can simplify work, but the final design must still comply with applicable local clearance, plumbing and building requirements. (The Spruce)
Should You Change the Plumbing Layout?
Keep the existing plumbing locations when the current arrangement is functional. Moving a toilet drain, shower drain or vent stack can require floor demolition, framing changes, additional labor and permit review.
Move plumbing when doing so solves a meaningful problem, such as:
- The entrance is blocked by the vanity
- The toilet is the first object visible from the hallway
- The shower cannot be entered safely
- A family member needs improved accessibility
- The current layout creates unusable corners
- Existing plumbing is already being replaced
- Water damage requires major floor reconstruction
Do not preserve a bad layout solely to save money. However, do not relocate fixtures merely because a social-media photograph shows a more fashionable arrangement.
How Much Does Remodeling a Tiny Bathroom Cost?
A tiny bathroom remodel can range from a modest cosmetic update to a full reconstruction. National cost pages show wide ranges because a powder-room refresh and a fully tiled bathroom with relocated plumbing are fundamentally different projects.
Recent published estimates include approximately $1,500–$15,000 for some small half-bath renovations, while broader full-bathroom remodeling ranges may extend well beyond that depending on materials, labor and scope. Home Depot currently presents broad full-remodel ranges rather than one guaranteed average, while Forbes’ earlier estimate placed a typical small remodel around $6,300. These figures should be treated as planning references, not local bids. (Angi)
Practical Budget Tiers
| Project Type | Typical Scope |
| Cosmetic refresh | Paint, mirror, faucet, lighting, hardware and minor repairs |
| Surface renovation | New vanity, toilet, flooring, fixtures and wall finishes |
| Full remodel | Demolition, new shower or tub, waterproofing, tile, vanity, plumbing and electrical updates |
| Layout-changing remodel | Relocated plumbing, framing changes, custom shower, new door or structural work |
| Premium compact remodel | Custom cabinetry, premium tile, frameless glass, advanced lighting and luxury fixtures |
Boca Raton Remodeling Services publishes local planning ranges of $5,000–$15,000 for cosmetic work, $20,000–$45,000 for a full mid-range gut remodel and higher amounts for luxury projects. The company also notes that final pricing depends on fixture selections, plumbing changes and conditions discovered during demolition. These are business-provided planning figures and should be confirmed through an itemized property-specific estimate. (Boca Raton Contractors)
What Drives the Cost?
The most important cost drivers are:
- Moving drains or supply lines
- Custom shower construction
- Waterproofing and substrate repair
- Tile size, pattern and installation complexity
- Hidden water or termite damage
- Electrical and ventilation upgrades
- Custom cabinetry
- Shower glass
- Permit and inspection requirements
- Condominium access restrictions
- Material lead times
- Structural or subfloor repairs
A small bathroom is not automatically inexpensive. It uses less material, but skilled plumbing, electrical, waterproofing and tile work still require setup, coordination and inspections.
How Much Contingency Should You Keep?
Reserve approximately 10% to 20% for uncertainty. A newer bathroom receiving surface updates may need less contingency than an older room being opened to the studs.
Use the higher end when:
- The home is older
- The shower has leaked
- The floor feels soft
- Plumbing has been repeatedly repaired
- Walls or floors will be opened
- The layout is changing
- Previous work may have been unpermitted
- Materials are being custom fabricated
A remodeling calculator can help establish an initial range, but it cannot inspect hidden framing, plumbing or water damage. The Boca Raton renovation cost calculator can be used as an early planning tool before obtaining detailed contractor estimates. (Boca Raton Contractors)
17 Space-Saving Ideas for Remodeling a Tiny Bathroom
1. Keep the Main Plumbing Wall
Keeping the shower, sink and toilet near their current drain and supply locations can reduce demolition and preserve more of the budget for visible improvements. It may also shorten the rough-in phase.
2. Replace an Inward-Swinging Door
A door that swings into a tiny bathroom may eliminate an entire wall from storage use. Depending on the structure and code requirements, consider:
- A pocket door
- An outward-swinging door
- A surface-mounted sliding door
- A narrower replacement door
A pocket door is not automatically the best choice. The wall must be able to accommodate the door cavity without conflicting with plumbing, electrical wiring or structural framing.
3. Choose a Properly Scaled Vanity
Compact vanities can provide storage without dominating the room. Consider a shallow-depth vanity, corner unit, floating cabinet or narrow furniture-style design.
Check:
- Overall depth
- Countertop projection
- Faucet clearance
- Drawer movement
- Door movement
- Sink-bowl size
- Plumbing position
- Leg and knee space
A floating vanity exposes more floor and can make cleaning easier. A vanity with full-extension drawers may provide better access than a deep cabinet with a single door.
4. Consider a Wall-Mounted Faucet
A wall-mounted faucet can free countertop depth and create a cleaner surface around a compact sink. However, it requires precise rough-in placement. The installer must coordinate the faucet reach, sink height, backsplash thickness and finished wall depth before closing the wall.
5. Use a Fixed Glass Shower Panel
A fixed panel can preserve sightlines and eliminate the clearance required by a hinged shower door. It works best when the shower is designed to control spray and direct water toward the drain.
Do not reduce the panel simply to create a more open appearance. A panel that is too narrow may allow water to escape onto the bathroom floor.
6. Evaluate a Curbless Shower
A curbless shower can create visual continuity and reduce a physical barrier. It may also support aging-in-place goals.
The design requires appropriate floor slope, waterproofing, drain placement and structural depth. In some existing homes, creating the required slope may involve altering the subfloor or using a specialized shower system.
7. Decide Honestly Whether You Need a Bathtub
Keep a tub when it supports how the household actually lives—for example, bathing young children, soaking or preserving the only bathtub in the home.
A shower may be more practical when:
- The tub is rarely used
- Entry over the tub wall is difficult
- The bathroom primarily serves adults
- A larger shower would solve a mobility problem
- The room has another bathtub elsewhere
The decision should reflect household needs and local resale expectations rather than a universal design rule.
8. Extend One Surface Through the Room
Continuous flooring and visually related wall finishes can reduce the number of boundaries the eye must process. This can make a small room feel calmer.
The floor should still be selected for wet-area performance, slip resistance and maintenance—not appearance alone.
9. Use Tile Scale Strategically
Large-format tile can reduce the number of grout lines and create a quieter surface. Smaller tile may be helpful on shower floors because the additional joints can follow the slope and may provide more texture.
Avoid assuming that large tile automatically makes every room feel bigger. The installer must consider room dimensions, cut sizes, wall flatness and waste. Recent design coverage has highlighted large-format surfaces and cohesive colors as ways to reduce visual fragmentation in compact rooms. (The Spruce)
10. Build Storage into the Wall
A recessed shower niche, medicine cabinet or between-stud shelf can provide storage without projecting into the room.
Plan recessed storage before plumbing and electrical rough-in. Exterior walls, pipes, vents and wiring may prevent a recess in the desired location.
11. Install a Recessed Medicine Cabinet
A mirrored medicine cabinet performs two jobs: visual reflection and hidden storage. Models with interior outlets can also keep electric toothbrushes or grooming tools off the countertop, subject to proper electrical planning.
12. Use Vertical Storage
Look above eye level for storage opportunities:
- A cabinet above the toilet
- Shallow floating shelves
- A shelf above the door
- Tall, narrow cabinetry
- Wall-mounted towel storage
- Hooks on unused wall sections
Pinterest collections show sustained interest in over-door shelves, hidden mirror storage, vertical towel racks and over-toilet organization. The useful lesson is not to copy every decorative arrangement, but to treat unused wall height as functional space. (Pinterest)
13. Install a Larger Mirror
A large mirror can reflect light, expand sightlines and reduce the visual weight of a compact vanity wall. Extend it wider than the sink when the layout allows.
The mirror should coordinate with sconces, outlets, faucets, cabinet doors and ceiling height before installation.
14. Layer the Lighting
A single ceiling light often creates shadows around the face and leaves shower areas dim.
A balanced plan may include:
- General ceiling lighting
- Vanity task lighting
- Shower-rated lighting
- A nightlight or low-level light
- Decorative lighting where space allows
- Dimmers for flexible brightness
Select fixtures approved for their location, especially in wet or damp areas. Electrical work should comply with current local requirements.
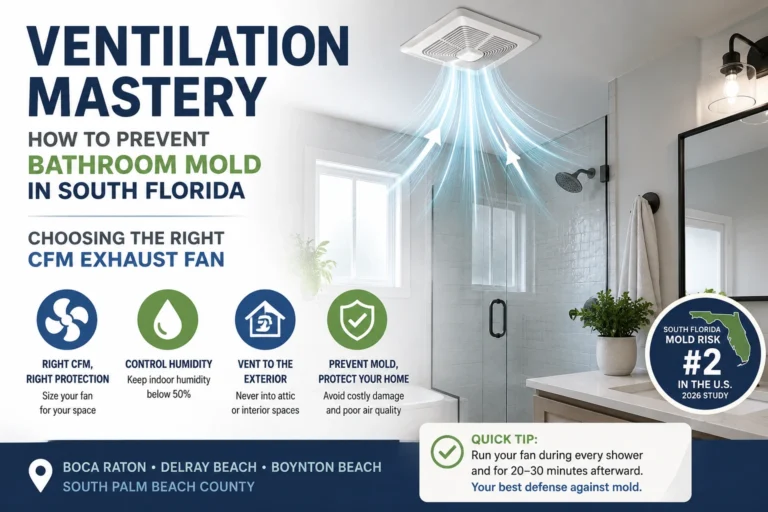
15. Upgrade the Exhaust Fan
Ventilation is essential in a small bathroom because moisture can accumulate quickly. The EPA recommends using bathroom exhaust fans or opening windows during showering and specifically advises exhausting bathroom moisture outdoors rather than into an attic. (US EPA)
The Home Ventilating Institute recommends a minimum 50 CFM fan for bathrooms of 50 square feet or less. Larger bathrooms are commonly sized at approximately one CFM per square foot, with additional considerations for fixtures and duct performance. Verify the final specification with the applicable code and project professional. (HVI)
Consider:
- A quiet, HVI-certified model
- Exterior ducting
- A timer
- A humidity sensor
- Properly sized ductwork
- Placement near the shower
- An accessible grille for cleaning
16. Select Water-Efficient Fixtures
WaterSense-labeled bathroom faucets use no more than 1.5 gallons per minute and are independently certified for efficiency and performance. The EPA states that replacing inefficient faucets can save the average family approximately 700 gallons of water per year. WaterSense also maintains certified product resources for toilets and showerheads. (US EPA)
Water efficiency does not compensate for a poor layout, but it is a sensible consideration when fixtures already need replacement.
17. Add Safety Without Making the Room Look Institutional
A tiny room should be planned for safe movement. Consider:
- Slip-resistant flooring
- A handheld showerhead
- Reinforcement for future grab bars
- Adequate lighting
- A low or curbless shower entry
- Easy-to-operate handles
- A stable place to sit where space permits
- A clear path free of projecting storage
The CDC recommends nonslip surfaces and grab bars inside or beside tubs and showers and near the toilet when support is needed. Current CDC guidance also identifies improved lighting and reduced trip hazards as practical fall-prevention measures. (CDC)
What Materials Work Best in a Tiny Bathroom?
The best materials tolerate moisture, frequent cleaning and daily use while keeping maintenance manageable.
Porcelain Tile
Porcelain is widely used for bathroom floors and shower walls because it offers many sizes, textures and appearances. Select floor tile based on its suitability for wet conditions rather than visual style alone.
Ceramic Tile
Ceramic tile can be a cost-conscious choice for walls and lower-impact areas. Confirm that the selected product is approved for its intended location.
Quartz or Solid-Surface Countertops
These surfaces can provide a consistent, easy-to-clean vanity top. In a very small room, an integrated sink may reduce seams and simplify cleaning.
Moisture-Resistant Cabinetry
Cabinet construction matters in humid areas. Ask about the cabinet box, exposed edges, finish, hardware and warranty—not only the door style.
Appropriate Wall Paint
Use a washable finish formulated for humid interior environments. Paint should not be used as a substitute for waterproofing in a shower or other direct-wet area.
Why Is Bathroom Waterproofing So Important?
Tile and grout are finish surfaces; they should not be treated as the bathroom’s complete waterproofing system. A tiled shower needs a properly designed assembly that directs water to the drain and protects the surrounding structure.
A complete system may include:
- An approved shower base or sloped mortar bed
- A sheet or liquid-applied waterproof membrane
- Treated penetrations
- Correct drain integration
- Waterproofed corners and transitions
- Appropriate backer material
- Flood testing when required
- Compatible setting materials
Waterproofing products should be installed as a complete, compatible system according to manufacturer instructions. Combining unrelated products without confirming compatibility can create weak transitions or warranty problems.
Do not select a contractor solely because the tile work looks attractive. Ask what waterproofing system will be used, how penetrations will be treated and whether the shower base will be tested before tile installation.
Do You Need a Permit to Remodel a Tiny Bathroom?
Permit requirements depend on the location and scope. Surface-level work may be treated differently from work that relocates plumbing, changes wiring, alters walls or modifies ventilation.
Florida Building Code resources state that regulated construction, alteration and repair work generally requires application to the appropriate building official, although exemptions and local procedures may apply. Homeowners should confirm requirements with the City of Boca Raton, Palm Beach County or the authority having jurisdiction before construction begins. (Florida Building)
Boca Raton Remodeling Services states that it manages applicable drawings, permits, inspections and final closeout for bathroom projects involving regulated work. (Boca Raton Contractors)
Ask these questions before signing a contract:
- Which permits does this scope require?
- Who will apply for them?
- Are permit fees included?
- Which inspections are expected?
- Who coordinates licensed plumbing and electrical work?
- How will permit closeout be documented?
- Does the condominium or HOA require separate approval?
What Is the Correct Bathroom Remodeling Sequence?
A typical full remodel should follow a coordinated order.
Step 1: Inspection and Planning
Document dimensions, moisture problems, plumbing locations, electrical conditions, structural concerns and household needs.
Step 2: Scope and Budget
Define what is being retained, removed, relocated and added. Create material allowances and a contingency.
Step 3: Design and Product Selection
Confirm the exact dimensions of the vanity, sink, toilet, shower system, tile, glass, lighting and accessories.
Step 4: Permits and Ordering
Submit necessary permit documents and order long-lead products before demolition.
Step 5: Demolition
Remove finishes carefully and inspect the subfloor, framing and plumbing for hidden damage.
Step 6: Plumbing, Electrical and Ventilation Rough-In
Complete drain, supply, wiring, outlet, lighting and exhaust-duct changes while walls and floors are open.
Step 7: Framing and Substrate Preparation
Repair framing, level surfaces and install appropriate wall and floor substrates.
Step 8: Waterproofing
Install the selected waterproofing system and complete required testing or inspection before covering it.
Step 9: Tile and Finish Surfaces
Install tile, flooring, paint and other finishes in the planned sequence.
Step 10: Fixtures and Cabinetry
Install the vanity, toilet, faucets, shower trim, glass, lighting and mirror.
Step 11: Accessories and Final Testing
Install hooks, bars, shelves and hardware. Test drainage, water temperature, outlets, ventilation, doors and drawers.
Step 12: Inspection and Walkthrough
Complete required inspections, correct punch-list items and collect warranty, care and permit records.
What Tiny Bathroom Remodeling Mistakes Should You Avoid?
Buying Fixtures Before Confirming the Layout
A discounted vanity is not a bargain if it blocks the toilet or prevents the door from opening.
Choosing Appearance Over Function
Textured stone, intricate grout patterns or custom hardware may look attractive but require more maintenance than the household wants.
Ignoring Door and Drawer Movement
Draw every swing and opening on the floor plan.
Moving Plumbing Without a Clear Benefit
Relocating pipes should solve a real functional problem.
Reducing the Shower Too Far
A technically fitting shower may still feel uncomfortable or allow water to escape.
Forgetting Countertop and Faucet Projections
Fixture specifications often list cabinet dimensions but not every projection created by handles, countertops or faucets.
Using Tile as the Waterproofing Plan
Tile, grout and sealant are not substitutes for a properly installed waterproofing assembly.
Venting Moisture into an Attic
Bathroom exhaust should be directed outdoors. The EPA specifically warns against sending moisture into attic spaces. (US EPA)
Underestimating Lighting
A bright paint color cannot replace properly placed task lighting.
Filling Every Wall with Storage
Storage should reduce clutter, not make the room feel narrower. Favor shallow and recessed solutions.
Comparing Contractor Quotes Only by Total Price
Compare demolition, disposal, materials, allowances, waterproofing, permits, glass, painting, electrical work, cleanup, exclusions and warranty terms line by line.
What Can Homeowners Do Themselves?
Homeowners may be able to handle limited cosmetic work depending on their experience, local rules and project conditions.
Possible DIY tasks include:
- Painting outside direct-wet areas
- Installing simple accessories
- Replacing removable organizers
- Updating cabinet hardware
- Caulking minor appropriate joints
- Assembling freestanding storage
- Removing décor before construction
Professional or properly licensed trade involvement is generally more appropriate for:
- Plumbing relocation
- Drain and vent work
- Electrical circuits and wet-location fixtures
- Structural framing
- Shower waterproofing
- Custom shower pans
- Major tile preparation
- Ventilation duct installation
- Permit-dependent work
- Suspected mold or substantial water damage
The most expensive failures often occur in work that becomes hidden behind tile and drywall. Save money on decorative items before cutting the budget for waterproofing, electrical safety or plumbing quality.
Tiny Bathroom Remodel Planning Checklist
Before Design
- Measure the room accurately.
- Photograph existing conditions.
- Identify leaks and soft flooring.
- List daily storage needs.
- Decide who will use the bathroom.
- Determine whether a tub is necessary.
- Set a preliminary budget and contingency.
Before Ordering
- Confirm the final floor plan.
- Check every fixture dimension.
- Confirm door and drawer movement.
- Select the waterproofing system.
- Verify ventilation capacity and duct route.
- Determine permit requirements.
- Confirm electrical and lighting locations.
- Review material lead times.
Before Construction
- Sign a detailed written scope.
- Confirm allowances and exclusions.
- Establish the change-order process.
- Document the project schedule.
- Confirm access, dust control and cleanup.
- Order critical materials.
- Verify permit responsibility.
- Plan for bathroom downtime.
Before Final Payment
- Test all faucets and drains.
- Check hot-water operation.
- Test GFCI-protected outlets.
- Run and inspect the exhaust fan.
- Examine grout, sealant and tile transitions.
- Check doors and drawers.
- Review the punch list.
- Obtain warranties and care instructions.
- Collect final permit and inspection records.
Final Thoughts
A successful tiny bathroom remodel is not defined by how many design trends fit inside the room. It succeeds when the layout feels natural, storage is easy to reach, moisture is controlled and every fixture supports daily routines.
Start with the problems that cannot be seen in a finished photograph: plumbing, floor condition, ventilation, waterproofing and circulation. Then use mirrors, lighting, compact cabinetry and carefully selected surfaces to make the room feel brighter and more open.
For a property-specific plan, homeowners can review thebathroom remodeling services available from Boca Raton Remodeling Services or request a remodeling consultation. The most useful first conversation should focus on your room dimensions, functional priorities, existing conditions and realistic project scope.
FAQs
How do I make a tiny bathroom feel larger?
Use a clear layout, continuous flooring, a large mirror, layered lighting, compact fixtures and shallow or recessed storage. Reducing visual clutter usually has more impact than using white paint alone.
What is the best layout for a small full bathroom?
A common efficient layout places the vanity, toilet and tub or shower along one wall. The best arrangement depends on the door, plumbing, windows, structural conditions and required clearances.
Should I install a shower instead of a bathtub?
Install a shower when accessibility, daily convenience or additional standing space matters more than bathing. Keep the bathtub when it supports children, personal preferences or the home’s only bathing option.
Is a walk-in shower suitable for a tiny bathroom?
Yes. A properly designed walk-in shower can reduce visual barriers and eliminate a swinging enclosure door. Drainage, waterproofing and splash control must be planned carefully.
Is a curbless shower worth it?
A curbless shower can improve accessibility and create visual continuity. It is worthwhile when the structure allows proper floor slope, drainage and waterproofing without causing problems at the bathroom entrance.
How much does a tiny bathroom remodel cost?
Costs vary widely. A cosmetic update may cost several thousand dollars, while a complete renovation with tile, waterproofing, plumbing and electrical work can reach tens of thousands. Obtain itemized local estimates.
What is the most expensive part of a small bathroom remodel?
Custom showers, tile labor, plumbing relocation, waterproofing, shower glass and hidden structural repairs are often major cost drivers.
How long does a small bathroom remodel take?
A cosmetic update may take several days. A full permitted remodel often takes several weeks, depending on inspections, material availability, waterproofing, tile complexity and hidden repairs.
What size exhaust fan does a small bathroom need?
HVI recommends at least 50 CFM for bathrooms measuring 50 square feet or less. The final fan and duct design should comply with the applicable code and room conditions.
Does a small bathroom need a window?
Requirements vary by location and ventilation method. A window may provide natural light and supplemental ventilation, but a properly ducted exhaust fan is generally the more reliable method of removing shower moisture.
Are large tiles good for a tiny bathroom?
Large tiles can create fewer grout lines and a calmer appearance. They require sufficiently flat surfaces and a layout that avoids awkward cuts. Smaller tile may be more practical on sloped shower floors.
Do I need a permit for a tiny bathroom remodel?
A permit may be required when the project changes plumbing, electrical systems, walls, ventilation or structural components. Confirm the requirements with the local building authority before work begins.
Should I use a floating vanity?
A floating vanity can expose more flooring and create a lighter appearance. It should be properly supported and coordinated with wall framing, plumbing height and desired storage.
How can I add storage without making the bathroom feel smaller?
Use a recessed medicine cabinet, shower niche, shallow wall cabinet, vanity drawers, hooks and storage above the toilet or door. Keep everyday items concealed where possible.
What should I never reduce in a bathroom remodeling budget?
Do not cut essential spending for waterproofing, plumbing, electrical safety, ventilation, structural repairs or required permits. Save on decorative finishes before compromising hidden construction quality.