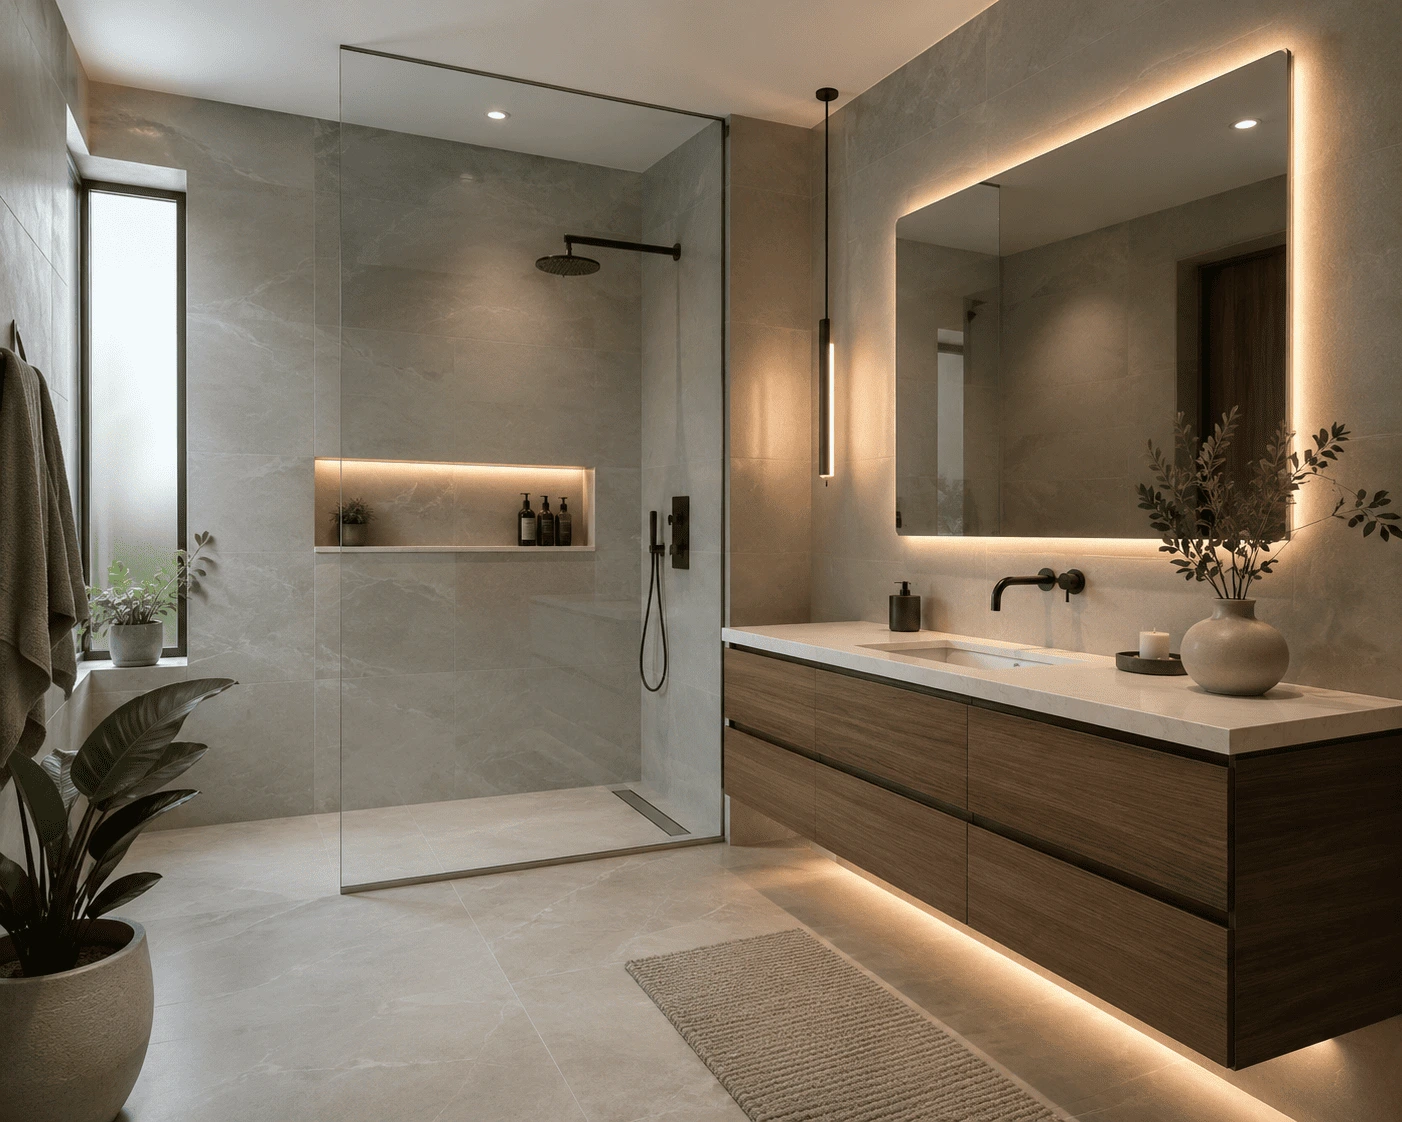
A beautiful bathroom can still be frustrating when it lacks storage, traps moisture or forces people to squeeze around poorly placed fixtures. That is why the best bathroom remodeling ideas do more than make a room look new. They improve how the bathroom works every morning, how safely it can be used and how easily it can be maintained.
Quick Bathroom Remodeling Ideas
Use this table to match your remodeling goal with the upgrade that delivers the biggest impact.
| 🏡 Remodeling Goal | ✅ Best Upgrade | ⭐ Primary Benefit |
|---|---|---|
| Make the bathroom feel larger | Frameless walk-in shower | Creates an open, spacious appearance |
| Add more storage | Floating vanity with deep drawers | Improves organization while keeping the floor visible |
| Improve accessibility | Curbless shower with grab-bar blocking | Safer and easier for all ages |
| Increase home value | Walk-in shower + modern vanity | Appeals to many buyers |
| Reduce cleaning time | Large-format porcelain tile | Fewer grout lines to maintain |
| Prevent mold and moisture | Humidity-sensing exhaust fan | Improves ventilation and indoor air quality |
| Lower water bills | WaterSense-certified fixtures | Uses less water without sacrificing performance |
| Create a luxury look | Statement shower wall with layered lighting | High-end appearance without remodeling every surface |
Before choosing tile or fixtures, think about the problems you want the remodel to solve. You may need a larger shower, better ventilation, more counter space, easier cleaning or a layout that supports aging in place. Once those priorities are clear, design decisions become much easier.
This bathroom remodeling guide covers practical upgrades for small guest bathrooms, family bathrooms, powder rooms and primary suites. It also explains budgeting, materials, common mistakes and the remodeling sequence homeowners should understand before demolition begins.
What Are the Best Bathroom Remodeling Ideas?
The best bathroom remodeling ideas improve layout, storage, lighting, ventilation, water efficiency and safety before adding decorative details. High-value options include walk-in showers, floating vanities, recessed storage, layered lighting, porcelain tile, efficient fixtures and accessible features that support long-term use.
A bathroom should be designed around the people who use it. A family bathroom may need durable surfaces and closed storage, while a primary bathroom may benefit from a larger shower and separate vanity areas. A guest bathroom may need only a targeted refresh.
Use the following ideas as a decision list rather than a shopping list. Not every bathroom needs every feature.
Which Bathroom Remodel Fits Your Home?
Every bathroom has different priorities. Use this quick comparison to identify the remodeling approach that best matches your space, lifestyle and budget before selecting materials or fixtures.
| Your Goal | Recommended Remodeling Focus | Why It Works |
|---|---|---|
| 💰 Reduce Remodeling Costs | Cosmetic Refresh | Keep the existing layout while updating paint, vanity, lighting, hardware and mirrors to improve appearance without major plumbing work. |
| 🚿 Create a More Spacious Bathroom | Walk-In Shower | Removes visual barriers, improves accessibility and makes even smaller bathrooms feel more open. |
| 📦 Increase Storage | Floating Vanity + Recessed Cabinets | Maximizes storage while keeping the floor visually open and reducing clutter. |
| ♿ Improve Accessibility | Curbless Shower & Grab Bar Blocking | Creates safer access today while preparing the bathroom for future mobility needs. |
| 🏡 Increase Home Value | Modern Vanity, Walk-In Shower & Porcelain Tile | These upgrades combine timeless design with everyday functionality and broad buyer appeal. |
| 🧹 Reduce Cleaning Time | Large-Format Porcelain Tile & Frameless Glass | Fewer grout joints and smoother surfaces make routine cleaning much easier. |
| 💧 Prevent Moisture & Mold | Waterproofing + Exterior-Vented Exhaust Fan | Proper moisture management protects walls, finishes and indoor air quality. |
| ✨ Create a Luxury Look | Floating Vanity, Layered Lighting & Statement Tile | Adds visual depth and high-end style without overwhelming the space. |
1. Fix the Layout Before Choosing Finishes
A better layout can create more usable space without physically enlarging the bathroom. Start by identifying blocked walkways, tight door swings, poor fixture placement and areas where two people cannot move comfortably.
Draw the existing room to scale and mark the location of the toilet, vanity, shower, tub, windows and doors. Then note where the layout causes daily inconvenience.
Sometimes a major improvement requires only a smaller vanity, an outward-opening door or a glass shower panel instead of a swinging enclosure. In other cases, moving plumbing may be justified because the current arrangement wastes valuable floor area.
Keeping plumbing fixtures near their existing supply and drain lines usually reduces cost. However, preserving a bad layout simply to avoid plumbing work can leave you dissatisfied with an otherwise expensive remodel.
Finalize the floor plan before ordering tile, cabinetry or plumbing fixtures.
2. Replace a Cramped Enclosure With a Walk-In Shower
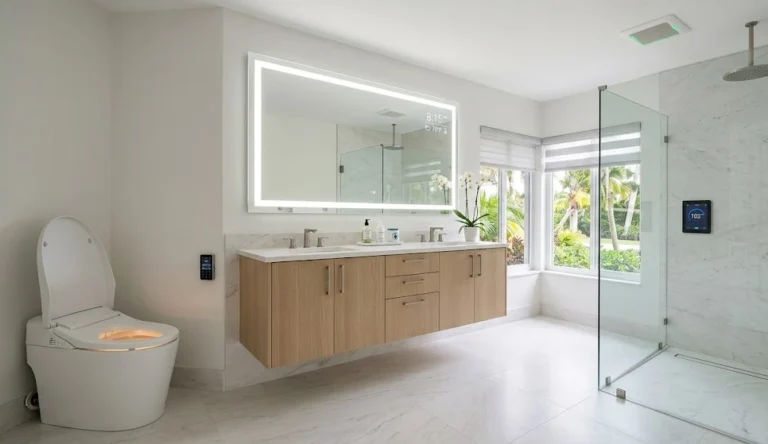
A walk-in shower can make a bathroom feel more open, improve accessibility and provide more room for bathing. It works particularly well when replacing an unused bathtub or a small enclosed shower.
Frameless glass allows light to travel across the room and reduces the visual barriers that make small bathrooms appear crowded. A fixed glass panel may also require less clearance than a swinging shower door.
Plan the shower around daily comfort. Useful features include:
- A handheld showerhead
- A built-in or fold-down bench
- A recessed niche
- A low or zero-threshold entrance
- Properly located controls
- Slip-resistant shower-floor tile
Doorless showers look clean and modern, but they require careful sizing. A shower that is too shallow can allow water and cool air to escape into the room.
3. Consider a Curbless Shower for Long-Term Accessibility
A curbless shower eliminates the raised threshold at the entrance, making the shower easier to enter for children, older adults and people with limited mobility. It can also create a cleaner visual transition in a small bathroom.
The shower floor must be properly sloped toward the drain. Depending on the home’s construction, the installer may need to recess the subfloor or use a specialized shower system to create the required slope without producing an awkward ramp.
Curbless construction is not merely a decorative choice. Waterproofing must continue beyond the immediate shower area, particularly when a bathroom is designed as a wet room.
This work should be planned before demolition because floor framing, drain location and finished tile height affect whether the design is practical.
Before You Remodel Your Bathroom
Complete these planning steps before choosing tile, fixtures, or finishes. A little preparation helps prevent costly changes, delays, and unexpected surprises during construction.
| Planning Step | Why It Matters | |
|---|---|---|
| ✓ | Measure the Bathroom | Record room dimensions, plumbing locations, doors, windows, and ceiling height before planning the new layout. |
| ✓ | Set a Realistic Budget | Include labor, materials, permits, demolition, and a contingency for hidden issues behind walls or beneath flooring. |
| ✓ | Decide Whether to Keep the Bathtub | Consider your family’s needs, available space, resale value, and whether another bathroom already includes a tub. |
| ✓ | Review the Existing Plumbing Layout | Keeping fixtures close to existing plumbing often reduces remodeling costs and construction time. |
| ✓ | Confirm Permit Requirements | Projects involving plumbing, electrical work, or structural changes may require permits and inspections. |
| ✓ | Finalize the Floor Plan | Choose the layout before ordering vanities, shower glass, tile, or plumbing fixtures. |
| ✓ | Select a Waterproofing System | Proper waterproofing protects walls and floors from moisture damage and is more important than decorative finishes. |
| ✓ | Order Long-Lead Materials Early | Custom vanities, specialty tile, and plumbing fixtures may require several weeks for delivery. |
4. Convert an Unused Tub Into a Larger Shower
A tub-to-shower conversion is a practical choice when household members rarely take baths and the existing bathtub occupies space that could support a safer, more comfortable shower.
Before removing the tub, consider who may use the home in the future. Families with young children often value at least one bathtub somewhere in the house. A primary bathroom, however, does not always need a tub when another full bathroom provides one.
Use the recovered space for a wider shower, bench, storage niche or handheld shower system. Keeping the drain and water supply near their existing locations can help control plumbing costs.
Do not assume a conversion is a surface-level project. The contractor should inspect the subfloor, wall framing, plumbing and waterproofing after the original tub is removed.
5. Keep a Bathtub When It Serves a Real Purpose
A bathtub remains valuable for families with children, homeowners who regularly soak and properties where buyers may expect at least one tub. The best decision depends on lifestyle, available space and the other bathrooms in the home.
An alcove tub is usually more space-efficient than a freestanding model. It can also provide a practical tub-and-shower combination in a family bathroom.
Freestanding tubs create a strong focal point but need clearance for cleaning, plumbing access and safe movement. Avoid forcing one into a room where it creates narrow walkways or reduces shower space.
A design should not include a tub solely because it looks appealing in photographs. Every major fixture should earn the space it occupies.
6. Install a Floating Vanity
A floating vanity can make a compact bathroom feel larger by exposing more floor area. It also allows the installation height to be adjusted for the people using the room.
Wall-mounted vanities work especially well in contemporary and transitional bathrooms. Under-vanity lighting can provide soft nighttime illumination without requiring a bright overhead fixture.
Before installation, confirm that the wall has sufficient structural support. Plumbing must also be positioned carefully because exposed drain lines can interfere with the clean appearance.
A floating vanity may offer less storage than a floor-mounted cabinet of the same width, so choose deep drawers or add a nearby linen cabinet when storage is important.
7. Choose Drawers Instead of Deep Cabinet Cavities
Wide drawers usually provide more accessible bathroom storage than deep cabinets with doors. They keep frequently used products visible and reduce the need to reach around plumbing.
Use divided drawers for cosmetics, grooming tools and small supplies. A deeper lower drawer can hold towels, toilet paper or cleaning products.
Ask the cabinet supplier how the drawers are shaped around the sink and drain. Well-designed vanities use U-shaped or offset drawers to preserve storage around plumbing.
Moisture resistance matters as much as style. Cabinet edges, drawer boxes and finishes should be suitable for humid conditions rather than relying on low-density materials that can swell after repeated exposure.
8. Add Recessed Storage
Recessed storage uses wall cavities to provide organization without taking up floor space. Common examples include medicine cabinets, shower niches and shallow linen cabinets.
A mirrored recessed medicine cabinet can offer much more storage than a decorative mirror while maintaining a streamlined appearance. Inside the shower, a properly waterproofed niche keeps bottles off the floor and away from window ledges.
Coordinate niche placement with the tile layout. A niche that is sized without considering the tile pattern may create narrow cuts and distracting grout lines.
Exterior walls and walls containing plumbing may limit recess depth. Confirm the wall structure before ordering a cabinet or finalizing niche dimensions.
9. Use a Larger Mirror to Expand the Room Visually
A larger mirror reflects light and creates a stronger sense of depth, making it one of the most effective low-construction upgrades for a small bathroom.
Extend the mirror across most of the vanity width. In a double-vanity bathroom, one large mirror can create a more continuous visual plane, while two separate mirrors can provide space for wall sconces between them.
Consider an integrated medicine cabinet when storage is limited. Heated or defogging mirrors may be useful in bathrooms that experience persistent condensation, although proper ventilation is still essential.
Make sure the mirror height works for all regular users rather than positioning it only for appearance.
10. Create Layered Bathroom Lighting
Good bathroom lighting combines general illumination, face-level task lighting and optional accent or nighttime lighting. One ceiling fixture rarely provides flattering or functional light on its own.
Place vertical sconces on both sides of the mirror when space allows. This arrangement reduces the shadows that overhead vanity lights can cast beneath the eyes and chin.
Recessed ceiling lights can provide general illumination, while a wet-location fixture may be used over a shower where permitted. Dimmers allow the same bathroom to support morning grooming and evening relaxation.
Use lighting with consistent color temperature. Mixing very warm and very cool lamps can make finishes appear mismatched.
Electrical work in a bathroom must follow applicable requirements for wet locations and GFCI protection. A licensed electrician should handle new circuits, wiring or relocated fixtures.
11. Upgrade the Exhaust Fan
An effective exhaust fan removes moisture before it contributes to peeling paint, odors or mold. It should be properly sized, vented outdoors and quiet enough that household members will use it consistently.
ENERGY STAR states that certified ventilation fans use about 48% less energy than standard models and are designed to provide efficient, lower-noise performance. (ENERGY STAR)
Look for:
- Appropriate airflow capacity
- A low sone rating
- Exterior ducting
- A timer or humidity sensor
- Accessible components for cleaning
A high-rated fan connected to restrictive or disconnected ductwork will not perform as expected. The complete ventilation path should be inspected during remodeling.
For South Florida-specific advice, see the bathroom ventilation and mold-prevention guide.
12. Use Large-Format Porcelain Tile Strategically
Large-format porcelain tile can reduce grout lines, simplify cleaning and create a calmer visual surface. It is available in stone, concrete and wood-inspired finishes without requiring the maintenance of many natural materials.
Large tiles do not automatically make installation easier. They require a flat substrate, careful layout and suitable mortar. Poor preparation can produce uneven edges, hollow spots or cracked tiles.
In small bathrooms, continuing the same or similar tile from the main floor into a curbless shower can reduce visual breaks. Use a smaller coordinating tile on the shower floor when additional grout joints are needed for traction and drainage slopes.
Order extra tile from the same production batch for cuts, breakage and future repairs.
13. Prioritize Slip-Resistant Flooring
Bathroom flooring should remain stable under wet conditions, feel comfortable underfoot and tolerate frequent cleaning. Appearance should never outweigh traction and durability.
Porcelain and ceramic tile are common choices, but surface texture and product rating vary. Highly polished tile may become slippery when wet.
Luxury vinyl may work in some bathroom areas when the product and installation method are approved for that application. It should not replace a properly constructed shower system or waterproofing assembly.
Use bath mats carefully. Loose rugs can create tripping hazards, particularly for older adults. Secure, low-profile options are safer than thick mats that slide or curl.
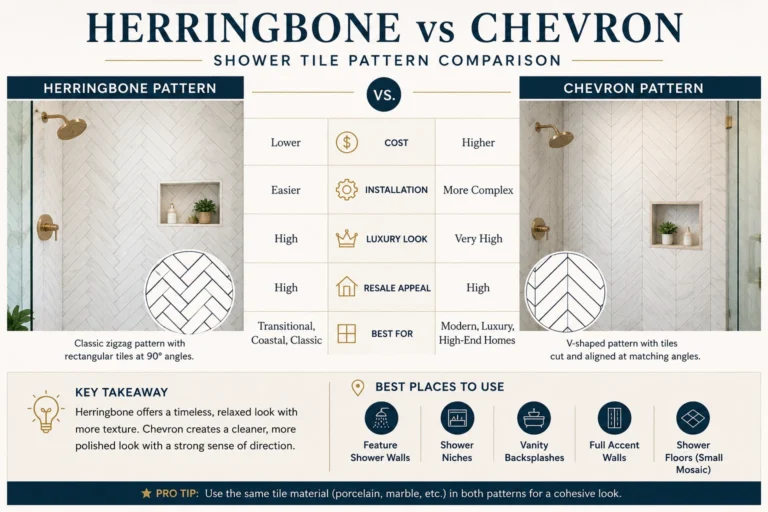
14. Use Statement Tile as a Controlled Focal Point
Statement tile is most effective when it creates one deliberate point of interest rather than competing across every surface. A shower wall, vanity backsplash or powder-room floor can provide enough visual impact.
Recent design coverage shows renewed interest in saturated color, checkerboard patterns, handcrafted texture and expressive tile. Designers commonly balance these stronger surfaces with quieter wood, stone or neutral finishes. (Better Homes & Gardens)
Before choosing a highly distinctive tile, consider whether you will still enjoy it after the trend changes. A safer strategy is to use bold tile in a smaller, replaceable area while keeping expensive permanent surfaces more restrained.
15. Introduce Warm Wood and Natural Texture
Wood tones, woven details and stone-inspired surfaces can prevent a modern bathroom from feeling cold. The goal is to add warmth without selecting materials that deteriorate in moisture.
Use properly finished wood or moisture-resistant cabinetry rather than untreated decorative wood near splashing areas. Porcelain with a natural-stone appearance can provide visual texture with less sealing and maintenance than some genuine stone products.
Warm oak, walnut and medium wood tones pair well with white, cream, green, blue and charcoal palettes. Repeat the wood tone in no more than a few places so the design feels coordinated rather than overly matched.
16. Select Water-Efficient Fixtures
Water-efficient toilets, faucets and showerheads can reduce household water use without requiring homeowners to accept poor performance when certified products are selected.
EPA WaterSense-labeled products meet efficiency and performance specifications and undergo independent third-party certification. WaterSense products are designed to use at least 20% less water than standard alternatives while performing as well as or better than regular models. (US EPA)
Check the label rather than relying only on marketing language such as “eco-friendly.” WaterSense certification applies to product categories including toilets, bathroom faucets and showerheads.
Browse the official EPA WaterSense product guidance before finalizing fixtures.
17. Add a Handheld Showerhead
A handheld showerhead improves flexibility for rinsing the shower, bathing children, washing pets and assisting a household member with limited mobility.
Install the slide bar where it can be reached from both a standing and seated position. The hose should be long enough to reach the bench and the far corners of the shower.
A combination system with a fixed head and handheld wand gives users more options. Confirm that the valve and plumbing system can support the selected arrangement without an uncomfortable drop in pressure.
Place controls near the shower entrance when possible so the water can be turned on without standing directly beneath it.
18. Add Blocking for Future Grab Bars
Installing structural blocking behind shower and toilet walls allows grab bars to be added securely later, even when they are not needed today. This low-cost preparation can prevent expensive wall demolition in the future.
Grab bars can be integrated into attractive bathroom designs. They are available in finishes and forms that coordinate with towel bars and shower hardware.
The CDC recommends grab bars inside and outside the bathtub or shower and next to the toilet as part of making homes safer for older adults.
A towel bar is not a substitute for a properly anchored grab bar. Reinforcement and installation must be designed to support a person’s weight.
19. Include a Shower Bench and Practical Niches
A shower bench supports comfort, grooming and accessibility. A properly positioned niche keeps products organized without adding hanging racks or floor clutter.
A full-width built-in bench requires significant shower depth. In a smaller enclosure, consider a corner bench or fold-down seat.
Slope horizontal surfaces slightly toward the drain so water does not pool. The bench, niche and surrounding walls must be integrated into the waterproofing system rather than installed as decorative additions after waterproofing is complete.
Position the niche where it is convenient but not directly under the strongest stream of water.
20. Use Smart Features Selectively
The best smart bathroom features solve a real problem, such as improving temperature control, nighttime visibility or ventilation. Technology should not make basic bathroom functions difficult when an app or internet connection fails.
Potentially useful options include:
- Humidity-sensing exhaust fans
- Timer switches
- Defogging mirrors
- Motion-activated night lighting
- Programmable heated floors
- Digital shower temperature controls
- Leak sensors near the vanity and toilet
Avoid adding technology simply because it is new. Ask how the product is serviced, whether replacement parts are available and whether manual operation remains possible.
21. Add Personality With Replaceable Finishes
Paint, wallpaper, towels, mirrors and hardware allow homeowners to express their style without committing every permanent surface to a short-lived trend.
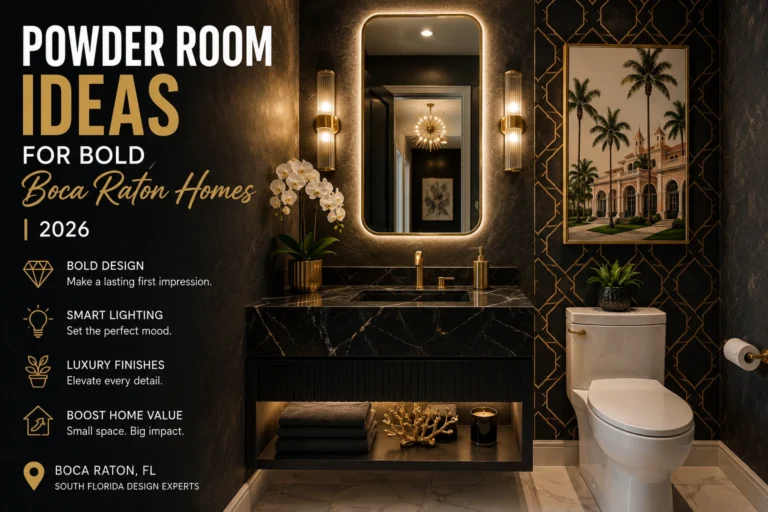
Powder rooms are particularly suitable for bold wallpaper, dark colors and decorative lighting because they experience less shower steam than full bathrooms.
In full bathrooms, select coatings and wallcoverings designed for moisture-prone environments. Even moisture-resistant finishes require working ventilation.
This strategy also helps control the budget. Invest more heavily in waterproofing, plumbing, cabinetry and durable flooring, then use easier-to-change finishes for color and personality.
Which Bathroom Remodeling Ideas Work Best in a Small Bathroom?
Small bathrooms benefit most from reducing visual barriers, using vertical storage and choosing fixtures with appropriate proportions. Floating vanities, frameless glass, recessed cabinets, consistent tile and improved lighting can make the room feel larger without moving walls.
A small bathroom should not be filled with undersized features simply to save inches. A vanity that is too shallow or a shower that is too narrow may create more frustration than the saved space is worth.
Prioritize these improvements:
- Replace a swinging shower door with a fixed panel or sliding system.
- Use a recessed medicine cabinet.
- Extend storage vertically with a linen tower.
- Choose a vanity with drawers.
- Install a larger mirror.
- Reduce unnecessary color and material changes.
- Improve lighting at the mirror.
- Keep the floor as visually open as possible.
Explore additional small bathroom remodeling ideas for compact Boca Raton homes and condos.
How Much Does a Bathroom Remodel Cost?
Bathroom remodeling costs depend on the size of the room, project scope, labor market, material level, plumbing changes, waterproofing needs and hidden conditions. Cosmetic updates cost less than projects that move drains, replace a shower system or change the layout.
Published ranges vary because some estimates cover DIY work while others include professional labor, permits and custom finishes. Lowe’s gives a broad DIY planning range of approximately $5,000 to $15,000 for a moderate full-bathroom remodel, while contractor-led and custom projects can be substantially higher.
Boca Raton Remodeling Services currently groups local projects into broad planning categories ranging from cosmetic refreshes to full mid-range and luxury master-bath renovations. These figures are planning references rather than quotes because each home must be inspected individually.
| Remodel level | Typical scope | Main cost drivers |
| Cosmetic refresh | Paint, hardware, lighting, mirror and vanity replacement | Product quality and minor labor |
| Targeted renovation | New vanity, flooring, toilet or shower enclosure | Tile labor, plumbing connections and repairs |
| Full remodel | Demolition, shower, tile, vanity, lighting and ventilation | Waterproofing, licensed trades and hidden damage |
| Custom renovation | Layout changes, wet room, custom cabinetry and premium finishes | Plumbing relocation, specialty labor and long-lead materials |
Use the renovation cost calculator for an initial planning range, then obtain a detailed site-specific proposal.
How can you save money without cutting critical quality?
Keep plumbing near its current location when the layout already works. Choose a standard-size vanity, use one premium focal material instead of premium finishes everywhere and finalize selections before work begins.
Do not reduce spending on:
- Waterproofing
- Plumbing connections
- Electrical safety
- Ventilation
- Structural repairs
- Required permits
- Qualified installation
A lower-cost faucet can be replaced later. Failed waterproofing behind finished tile is much more expensive to correct.
What Is the Best Step-by-Step Bathroom Remodeling Guide?
A successful bathroom remodel normally moves from goals and measurements to design, budgeting, permitting, demolition, rough plumbing and electrical work, waterproofing, tile, fixture installation and final inspection. Completing work in the wrong sequence can create delays and expensive rework.
Step 1: Define the problem
Write down what is not working. Separate essential problems from visual preferences.
Examples include inadequate ventilation, poor storage, a leaking shower, insufficient lighting, an inaccessible tub or an inefficient layout.
Step 2: Measure and document the room
Record wall lengths, ceiling height, doorway width, window locations and fixture positions. Photograph plumbing, outlets and ventilation before demolition.
Step 3: Set the scope
Decide whether the project is a refresh, targeted renovation or complete remodel. A clear scope makes estimates easier to compare.
Step 4: Establish a working budget
Include labor, materials, permits, demolition, disposal and a contingency for hidden damage. Older bathrooms and projects that open walls usually need a larger reserve.
Step 5: Finalize the layout
Resolve fixture locations, door swings, shower dimensions and storage before ordering materials.
Step 6: Select fixtures and finishes
Choose the vanity, countertop, plumbing fixtures, tile, lighting, mirror and hardware. Confirm dimensions and compatibility rather than selecting by appearance alone.
Step 7: Check permits and approvals
Determine which building, plumbing and electrical permits apply. Condo owners should also obtain association approval and confirm working-hour, elevator and material-delivery rules.
Step 8: Order long-lead materials
Do not begin demolition while essential fixtures remain backordered. Verify that tile quantities include waste and future repairs.
Step 9: Complete demolition and inspection
Once surfaces are removed, inspect framing, subflooring, plumbing and electrical systems. Document any change to the original scope.
Step 10: Finish rough plumbing, electrical and ventilation
Move or replace supply lines, drains, circuits, lighting boxes and fan ducts before closing walls.
Step 11: Install the substrate and waterproofing
Waterproofing must form a continuous system across shower floors, walls, corners, niches, benches and penetrations.
Step 12: Install tile and finishes
Confirm the tile layout before cutting begins. Complete flooring, cabinetry, countertops, fixtures, glass and painting in the correct sequence.
Step 13: Test everything
Run faucets and showers, flush the toilet, inspect drainage, operate outlets, test lighting and confirm fan airflow.
Step 14: Complete the final walkthrough
Review grout, caulk, cabinet alignment, door clearance, glass, paint and hardware. Obtain permit closeout records and warranty information.
A printable version can be developed from the existing 25-step bathroom remodeling checklist.
Do You Need a Permit for Bathroom Remodeling in Boca Raton?
Bathroom work involving relocated plumbing, new electrical wiring, structural changes or significant construction may require permits and inspections. Cosmetic work may be treated differently, so homeowners should confirm the current requirements before beginning.
The City of Boca Raton provides online permit applications, inspection information and permit-status tools through its Building Permits and Inspections department. (myboca.us)
Homeowners outside the city’s jurisdiction may need to work with the Palm Beach County Permit Center instead. The correct authority depends on the property location.
Useful official resources include:
- City of Boca Raton Building Permits and Inspections
- Palm Beach County Permit Center
- Palm Beach County contractor license verification
Palm Beach County provides tools for checking whether contractors are county-certified or licensed by the State of Florida.
What Should South Florida Homeowners Prioritize?
South Florida bathroom remodeling should prioritize moisture management, exterior-vented exhaust, dependable waterproofing and materials that tolerate persistent humidity. Condo owners must also account for association approvals, restricted work hours and building-access requirements.
Do not treat tile as the waterproof layer. Tile and grout are finish surfaces; a complete waterproofing system must protect the substrate underneath.
Inspect existing fan ducting rather than assuming it reaches the exterior. Select cabinet materials and hardware that can tolerate humid conditions, and address active moisture damage before installing new finishes.
Boca Raton Remodeling Services describes its local process as including permitting, demolition, rough-in work, waterproofing, tile installation, fixture installation and final inspection. (Boca Raton Contractors)
For project-specific recommendations, review the company’s bathroom remodeling services in Boca Raton.
What Bathroom Remodeling Mistakes Should You Avoid?
The most expensive bathroom remodeling mistakes involve poor planning, inadequate waterproofing, weak ventilation, late material selections, unrealistic budgets and hiring decisions based only on the lowest price.
Choosing finishes before the layout
The layout determines tile quantities, vanity width, glass dimensions, plumbing placement and lighting locations. Design the space first.
Assuming tile is waterproof
Water can pass through grout joints and around penetrations. The system behind the tile must control moisture.
Ignoring ventilation
A beautiful room can quickly develop peeling paint, stained grout and musty odors when steam is not exhausted effectively.
Buying incompatible fixtures
A faucet may not fit the sink. A vanity may block the door. A shower valve may not support the selected head configuration. Check specifications before ordering.
Starting demolition too early
Backordered tile, cabinets or plumbing fixtures can leave a bathroom unusable for weeks.
Forgetting storage
Open shelves look attractive when styled, but daily products often require drawers or closed cabinets.
Following trends without considering maintenance
Fluted surfaces, detailed mosaics, natural stone and exposed plumbing may require more cleaning or maintenance than smooth porcelain and standard fixtures.
Comparing estimates only by total price
One contractor may include permits, waterproofing and disposal while another excludes them. Compare scopes line by line.
Bathroom Remodeling Checklist
Before approving the final design, verify that you have addressed:
- The room’s primary users
- Layout and walking clearances
- Shower or bathtub requirements
- Vanity storage
- Counter space
- Mirror size
- Lighting at the face
- GFCI-protected electrical work
- Exhaust capacity and exterior ducting
- Shower waterproofing
- Slip-resistant surfaces
- Grab-bar blocking
- Fixture accessibility
- Product lead times
- Permit responsibility
- Condo or HOA requirements
- Cleanup and debris removal
- Change-order procedures
- Final inspections
- Written warranty terms
Final Thoughts
The strongest bathroom remodeling ideas are not necessarily the most expensive or fashionable. They are the upgrades that solve real problems and continue working after the initial excitement of the renovation has passed.
Begin with layout, waterproofing, ventilation, storage and safety. Then use tile, color, mirrors and fixtures to create the style you want. This order protects the budget and helps produce a bathroom that is easier to use, clean and maintain.
Homeowners planning a renovation in Boca Raton can contact Boca Raton Remodeling Services for a site-specific evaluation, material guidance and a written project scope.
FAQs
What is the first thing to do when remodeling a bathroom?
Start by identifying the problems the remodel must solve. Measure the room, document fixture locations and decide whether the project is cosmetic, targeted or a complete renovation.
What is the most valuable bathroom upgrade?
The most valuable upgrade depends on the existing bathroom. A properly waterproofed walk-in shower, improved storage, better ventilation and modern lighting generally provide strong everyday benefits.
How much should I budget for a bathroom remodel?
Budgets vary widely by location, size and scope. Include labor, materials, permits, demolition and a contingency for hidden damage rather than budgeting only for visible fixtures.
How long does a bathroom remodel take?
A cosmetic update may take several days. A full renovation involving demolition, tile, plumbing, electrical work, waterproofing and inspections may take several weeks.
Should I keep the bathtub?
Keep at least one bathtub when it supports your household’s needs or likely buyer expectations. An unused primary-bath tub can sometimes be replaced with a more practical shower.
Is a walk-in shower good for a small bathroom?
Yes. Frameless glass, a fixed panel or a curbless entrance can reduce visual barriers and make a compact bathroom feel more open.
What is the best flooring for a bathroom?
Porcelain and ceramic tile are common choices because they tolerate water and frequent cleaning. Select a surface with suitable wet-area traction rather than choosing by appearance alone.
Does bathroom tile need waterproofing behind it?
Yes. Tile and grout are finish materials, not complete waterproofing systems. Wet areas need a properly installed membrane or approved waterproof substrate assembly.
Are floating vanities practical?
Floating vanities can be practical when they include functional drawers and are securely mounted. They expose more floor area but may provide less storage than some floor-mounted cabinets.
Are grab bars only for older adults?
No. Grab bars can help users of different ages recover balance on wet surfaces. Installing wall blocking during remodeling makes future grab-bar installation easier.
Do bathroom remodels require permits?
Permits may be required when plumbing, electrical systems, structure or layout are changed. Requirements differ by jurisdiction, so homeowners should confirm them before starting work.
What is the best way to reduce bathroom remodeling costs?
Keep the existing plumbing layout where it works, choose standard-size products, order materials early and use premium finishes selectively. Do not reduce spending on waterproofing or safety.
How can I prevent mold after remodeling?
Use a properly sized exhaust fan that vents outdoors, run it during and after showers, repair leaks promptly and keep grout, caulk and fan components maintained.
Should I hire a general contractor?
A general contractor may be valuable when the project requires multiple trades, permits, inspections and schedule coordination. Verify licenses, insurance, references and the written scope.
What bathroom colors are currently popular?
Warm neutrals, muted greens, blues, natural wood tones and controlled areas of stronger color are widely used. A timeless base with replaceable color accents reduces trend risk.