Who Comes First? Planning the Order of Trades in a Kitchen or Bath Remodel in South Florida
A kitchen or bathroom remodel is rarely one job. It is a string of smaller jobs done by different people: someone tears things out, a plumber and an electrician run new lines, an inspector checks their work, and then the drywall, cabinet, tile and finish crews arrive. When those jobs happen in the right order, the project feels calm. When they don’t, you pay for the same wall to be opened twice, a new floor gets scratched by a ladder, or a crew shows up to a room that isn’t ready and bills you for the trip anyway.
This guide walks through a sensible order of trades for a typical kitchen or bath remodel, with notes on what changes when the house or condo is in South Florida. Every project is different, and your contractor or designer will adjust the sequence to fit, but knowing the general shape helps you ask better questions and spot problems early.
Why the order matters
Most remodel headaches come from sequencing rather than workmanship. A good plumber can still cause trouble if the wall is closed before the inspection, and a careful painter can’t do much if the electrician still has to cut holes for new outlets. Getting the order right protects three things:
- Your finishes. Anything that goes in last (paint, flooring, countertops, fixtures) is easy to damage. The later it goes in, the less traffic it sees.
- Your inspections. In Florida, most plumbing, electrical and mechanical changes need a permit, and the inspector has to see the work before it is covered up. Closing a wall too early can mean opening it again.
- Your budget. Every return trip, change order or “we’ll have to redo that” adds cost. Sequencing is the cheapest way to avoid them.
Before anyone picks up a tool
The first stage is paperwork and planning, and in South Florida it often takes longer than homeowners expect.
If you live in a condo or a community with a homeowners association, check the rules before you book anyone. Many Boca Raton area associations require written approval for renovations, proof of the contractor’s license and insurance, and they may limit working hours, elevator use, parking for work vans and where debris can go. Some also have rules about soundproofing under new hard flooring. Getting this approval first keeps your schedule from stalling halfway through.
Next comes the permit. Your contractor normally applies for it through the local building department, and the work has to meet the Florida Building Code. Ask up front who is pulling the permit and which inspections will be needed. For larger jobs, Florida’s construction lien law may also require a Notice of Commencement to be recorded before work starts; your contractor or the building department can tell you whether your project needs one.
This is also the time to verify licenses. In Florida, many trades, including plumbing, electrical and air conditioning work, must be done by licensed contractors, and you can look up a license on the state’s Department of Business and Professional Regulation website (myfloridalicense.com). It takes a few minutes and is worth doing for every trade you hire, not just the general contractor.
Finally, think about timing. Hurricane season runs from June 1 to November 30. A remodel that leaves the house with exposed openings, a dumpster in the driveway or materials stored outside is harder to manage when a storm is forecast. If your project involves windows, doors or anything on the exterior, ask how the schedule would change if a storm comes through.
Stage 1: Protection and demolition
Before demolition, the crew should protect everything that is staying: floors along the path in and out, nearby rooms, air vents and the AC system. Dust from tile, drywall and old cabinets travels, and in a Florida home the air conditioner runs almost all year, so it is worth asking how the crew will keep dust out of the return vents and whether the filter should be changed afterwards.
Demolition then removes the old cabinets, counters, tile, fixtures and, if needed, drywall. This is also when hidden problems show up: soft subfloor around an old toilet, rust on supply lines, signs of a past leak or mold behind a shower wall. In a humid climate, moisture damage is common enough that you should plan a small contingency for it. It’s far better to deal with it now than after the new tile is down.
Stage 2: Rough-in work
With the room opened up, the trades that work inside the walls and floors go in. The usual order is:
- Framing changes, if you’re moving a wall, widening an opening or adding blocking for heavy cabinets, grab bars or a wall-hung vanity.
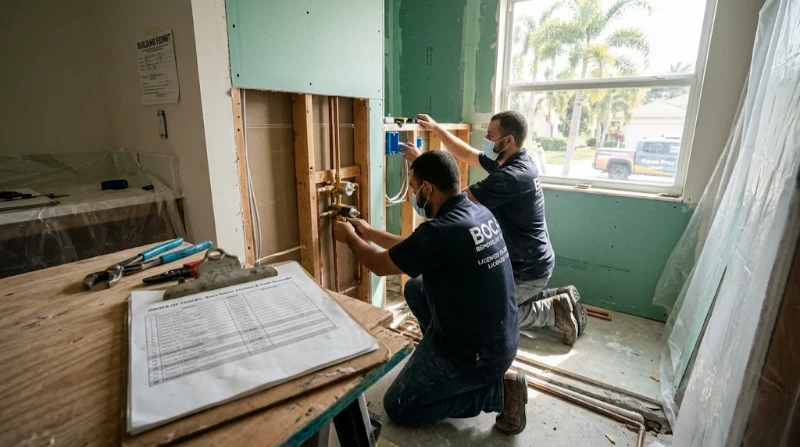
- Rough plumbing: new supply and drain lines, shower valves, and any relocated sink, dishwasher or toilet connections.
- Rough electrical: new circuits, outlets, under-cabinet lighting runs, exhaust fan wiring and any dedicated lines for appliances.
- HVAC or ventilation changes, such as rerouting a duct or installing a properly vented bathroom or range hood fan. Good ventilation matters more than usual in South Florida, where steam and humidity have nowhere to go without it.
Plumbing usually goes before electrical because drain lines have less room to move, and it’s easier for an electrician to route around pipes than the other way round. Your contractor may swap the order for a specific layout, and that’s fine as long as both trades know who goes first.
Stage 3: Inspections
Once rough-in is complete, the inspector checks the plumbing, electrical and mechanical work before anything is covered. This is the step homeowners most often don’t know about, and it’s the one that causes the most expensive rework when skipped. Ask your contractor to tell you when the rough inspections pass. If an item fails, it gets fixed while the walls are still open.
Stage 4: Closing the walls and waterproofing
After the rough inspections pass, insulation (where needed) and drywall go up. In wet areas, such as the shower and tub surround, the wall should get a proper backer board and a waterproofing system before any tile. In a climate where moisture never really goes away, this layer does more to protect your investment than almost anything else in the bathroom. Ask what waterproofing method the tile installer uses and whether it will be tested before tiling.
Stage 5: Cabinets, counters and tile
Now the room starts to look finished. A common order is:
- Prime and paint ceilings and walls (at least a first coat), since it’s easier before cabinets are in.
- Install cabinets and vanities.
- Template and install countertops. Stone fabricators usually measure once the cabinets are set, then return to install, so allow time between those visits.
- Tile backsplashes, shower walls and floors. Some installers tile the floor before cabinets so it runs under them; others tile around the cabinets to save material. Discuss which approach your installer prefers, because it affects the order above.
Stage 6: Finish trades
The last stage brings the plumber and electrician back for trim-out: faucets, sinks, toilets, shower trim, light fixtures, switches, outlet covers and appliance hookups. Then come final paint touch-ups, hardware, mirrors, accessories and any flooring outside the wet area. Final inspections close the permit. Keep your permit paperwork; you’ll want it if you sell the home or file an insurance claim later.
Quick-Reference: South Florida Kitchen & Bath Order of Trades
| Stage | Primary Trades | Key Milestone / Check |
|---|---|---|
| 0. Pre-Work | GC, Designer, Homeowner | HOA approval, permit issued, Notice of Commencement filed |
| 1. Prep & Demo | Demo Crew | AC vents sealed, surfaces protected, subfloor/mold checked |
| 2. Rough-In | Framing → Plumber → Electrician → HVAC | Blocking installed; pipes, wires, and ducts placed |
| 3. Inspection | City/County Inspector | Rough inspections passed before closing walls |
| 4. Close & Waterproof | Drywaller, Tile Prep | Cement board + waterproof membrane flood-tested |
| 5. Surfaces | Painter, Cabinet Installer, Fabricator, Tile Setter | Prime/paint, cabinets set, counters templated, tile laid |
| 6. Trim-Out | Plumber, Electrician, Finish Carpenter | Fixtures/appliances hooked up, final inspection passed |
How to compare quotes from different trades
When several trades are involved, quotes can overlap or leave gaps. A few simple habits help:
- Give every trade the same written scope and drawings, so they’re pricing the same job.
- Ask each one what is included and what isn’t, especially at the hand-offs: who patches drywall after the electrician, who disposes of old fixtures, who sets the toilet after the tile.
- Ask whether the price includes the permit and inspections for that trade’s work.
- Check that each quote lists the contractor’s license number, then verify it.
Questions to ask each pro before they start
- Are you licensed for this work in Florida, and are you insured?
- Who is pulling the permit, and which inspections will your work need?
- What do you need finished before you arrive, and what should be left open?
- How do you protect finished surfaces and the AC system from dust?
- If a hurricane watch is issued during the job, what’s your plan for the site?
- Who do I call if something goes wrong after you leave?
A remodel will always have surprises, but a clear order of trades turns most of them into small adjustments instead of expensive do-overs. Sit down with your contractor before demolition, agree the sequence and the inspection points, and you’ll spend more of the project watching the room come together and less of it waiting for someone to come back.
About the contributor: Team Home Pros Local runs Home Pros Local a free directory that helps homeowners find and contact local plumbers, electricians, HVAC technicians and other home-service pros.